Automation
(Last updated: Sunday May, 10, 2015)
SmartLamp

Every have an itch that needed scratching (figuratively in this case) ? My itch is my land line phone (yes I still have one, worked great during Hurricae Irene and Sandy). While watching TV, my wife will mute the phone listening to find out who it is. While we do have Tivo I still finding it annoying that most of the calls are some form of tele-marketing. Why do we listen? We have older relatives and those calls tend to be important. So having a nice way to tell us that those who are calling are on the white list are calling would be helpful. Enter the SmartLamp idea.
A nice lamp that would look normal in any living room and be acceptable to my wife is important to me. So when I discussed this with my wife I was surprised when she began helping me choose the lamp. The first lamp I found is an Ikea Borbby Lantern and an instructable how-to etch the glass to make it more opaque. The opaque glass should allow for enough light to be visible so the lamp is useful but also hide the electronics inside.
Much of today's HA isn't something I'd have sitting in the middle of my living room. Most of it I'd like to hide so it's not seen.
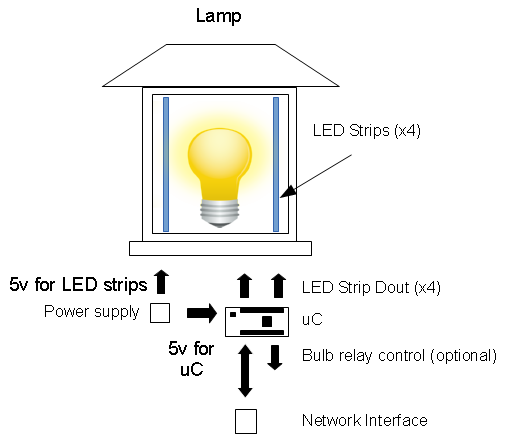
The basic operation of the lamp is not overly complex. The Fubarino Mini can use DHCP to get it's initial network settings. It then connects to a pre-configured MQTT server and configuration topic. This topic will allow the Fubarino to reconfigure itself to subscribe to the appropriate topic for commands and to publish its sensor data to the appropriate topics. The command topic would tell the Fubarino how to control the LED lighting sequence. The sequence would carry some kind of meaning. Such as flashing red could mean please pay attention something drastic is about to happen.
The use of MQTT will allow multiple command sources such as Misterhouse, Node-Red, shell scripts and/or Homeseer 3, to issue commands and listen to data. Additional sensors could be added to the Fubarino and it would publish this information to the appropriate topic for other processes to use.
This project will require an Borbby Lantern, an AC lamp kit, an AC/DC power supply, a Fubarino Mini, RGB LED strips, LED drivers, and a network interface. I like the larger Borbby lantern as it has plenty of room for everything and the LED strips will be positioned in the corners. The Fubarino Mini and network interface will sit, inside, at the base of the lamp. The etched glass will hide from view everything inside the lantern. The bulb can either be controlled by a relay or perhaps a Cree or Hue wireless bulb instead. The main purpose of the bulb is as a source of light (this is a lamp after all). An LED bulb would be a good choice as this would reduce the amount of heat being generated.
Parts list
- 1 x AC Lamp. A Japanese lamp or a lantern. Something that is opaque and large enough to hide the electronics
- 1 x AC Bulb - LED or CFL, something bright enough for the area but not something that will get too hot
- 1 x Fubarino Mini (or any Arduino++ like board you like :-)) mini micro-controller
- 1 x power supply AC/DC power supply
- 1 x RGB LED strip (addressable RGB LED strip)
- 1 x LED drivers (may not be needed)
- 1 x WIZ550io or ESP8266 (-01 or -12) SPI network interface
- 1 x DHT11 humidity/temperature sensor
Optional:
Status
20150717 - I now have the lamp on order, the Fubarino's, the network interface and a set of LEDs delevered. I'll probably get more LEDs but I have enough to start. I am experiencing a bit of trouble getting the SPI code to work with the WIZ550io board but I'm working on it.
Links
- SmartLamp Git repos
- SmartLamp project on hackaday.io
